Spanish Tortilla for One

Sometimes you just want to make a tortilla and have no leftovers. This is my version of a Spanish tortilla with a little Southwestern twist.

Ingredients:

  • 1 small Yukon Gold or Red Potato (approximately 1/2 cup)
  • 1/4 cup diced sweet or white onion
  • 2 eggs
  • 1 tablespoon diced green chiles
  • dashes of salt, pepper, smoked paprika and, thyme
  • Vegetable or olive oil for frying

Directions:

  • Slice the potatoes thinly using a sharp knife or mandolin. Leave the skin on.
  • Heat about 1/2 inch of oil in a frying pan or small Dutch oven (my choice) over medium low heat. When the oil is hot, add the potatoes and add more oil, if necessary, so that the potatoes are covered.
  • Cook the potatoes on low heat for about 20 minutes. They may break down a little but that is ok.
  • While the potatoes are cooking, beat the eggs in a bowl, add the diced green chiles and dashes of salt, pepper, smoke paprika and thyme.
  • Place about a tablespoon of oil in a cast iron or non-stick egg pan over medium heat, fry the onions until they begin to caramelize. About 10 minutes. Drain off any excess oil and add to the egg mixture.
  • Once the potatoes have fried for 20 minutes, remove them with a skimmer or spider into a colander and allow them to cool and drain for at least 5 minutes.
  • Once the potatoes have cooled, add the potatoes to the egg mixture and stir well. Let the egg mixture sit for about 15 minutes.
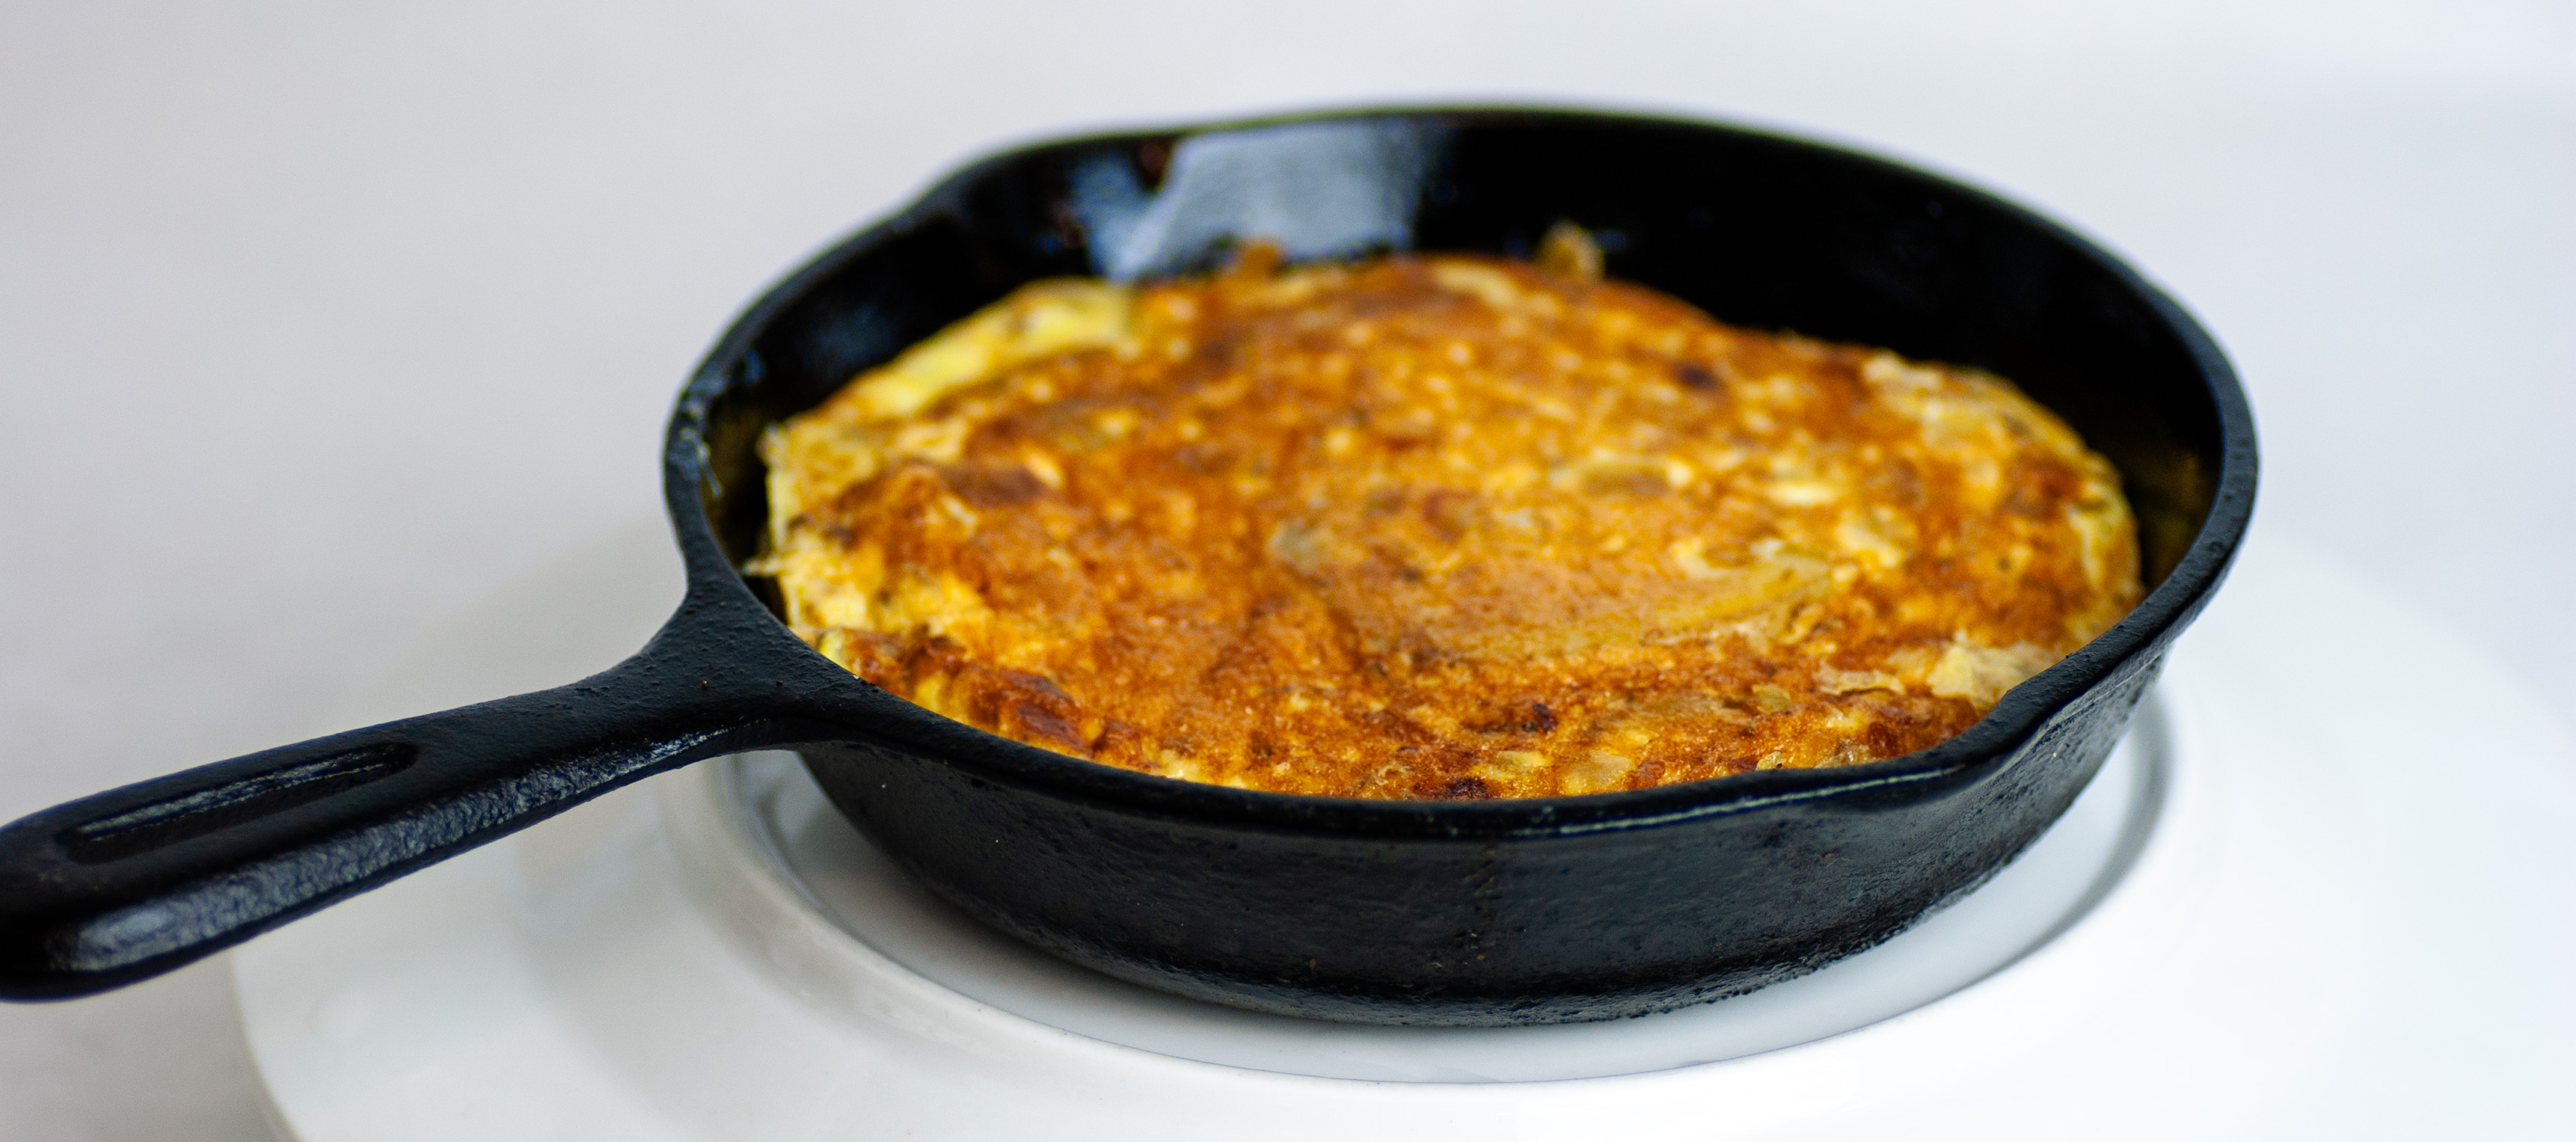
  • Place the egg pan over medium-low heat and pour in the egg mixture.
  • Cook over medium-low heat for about 6 to 8 minutes. Make sure the heat is low enough or the tortilla will cook to quickly and be rubbery. You can run a rubber spatula along the edges to make sure the tortilla isn’t sticking.
  • To flip the tortilla, take a large plate and slide the tortilla on to it. Now cover the tortilla with the egg pan and flip the tortilla into the pan and cook for another 6 to 8 minutes.
  • Slide the tortilla out of the pan and onto a serving plate and let cool a little before serving.

Best Cranberries in the Galaxy! Seriously!

Double “O,” double “M,” double “G” is the only way to describe this dish.

This cranberry dish is most associated with Thanksgiving dinner, but if you’re like us, you’ll be making them up all year long. Stir them into your next serving of yogurt or vanilla ice cream. Smear them on top of your toast. You’ll be figuring out a dozen new uses for them.

Ingredients:

  • 1 package (12 ounces) cranberries, rinsed (you can use frozen whole cranberries)
  • 1 cup sugar
  • 1 cup Ruby Port wine
  • 1 teaspoon Garam Masala (if you can’t find it in your local store, search for a recipe online, it’s pretty easy to make)

SONY DSC

In a medium size pan, mix sugar, wine and Garam Masala. Bring to boil over medium-high heat, stirring occasionally.

SONY DSC

Add the cranberries and reduce heat to medium.

Allow to cook for 10 minutes and gently stir occasionally (like a stir or two every minute).

SONY DSC

This is how they look just before removing from heat.

SONY DSC

Immediately remove from heat and transfer to a storage container.

SONY DSC

Place a paper towel over the top of the container and then loosely place the lid on top. Cool to room temperature. Remove paper towel and secure lid on top, then refrigerate.

SONY DSC

This is a must try!

Let me hear from you. What do you think? Best ever, or what?

Homemade Yogurt. It’s Easier Than You Think!

I’ve been making my own yogurt since the dark ages. It’s an easy process and doesn’t require a special “yogurt maker.” I have experimented with a number of “yogurt makers” for one reason or another and have always returned to the original format I learned from a traditional maker of yogurt and now share with you.

I’ve captured each step of the process in platinum black and white photos. I felt the look was appropriate for the age of this recipe.

I make a gallon of yogurt at a time. You can make smaller batches by reducing the ingredients equally. The time it takes to turn into yogurt will remain the same.

Materials needed are:

  • A double boiler pan (I use a large steamer/soup stock pan and a smaller stock pan set inside it)
  • Cooking thermometer
  • Assorted canning jars
  • Whisk
  • Ladle
  • Wide mouth funnel for canning

Ingredients needed are:

SONY DSC

  • Gallon of milk (I use non-fat. I find it sets firmer)
  • One cup of real organic yogurt (Once you get the process started you can use your own. Occasionally, you’ll need to “refresh” your batch by adding some store bought organic yogurt. Again, I use non-fat.)

The process is:

  1. Fill up the steamer pan with enough water that it will go half way up the side of the smaller pan when it is set in side it.SONY DSC
  2. Sit the steamer on the stove top and place the smaller pan in the water bath.SONY DSC
  3. Add the milk.SONY DSC
  4. Heat using a medium heat setting on the range.SONY DSC
  5. Place the lid on the pan holding the milk.SONY DSC
  6. Occasionally check the temperature and whisk the milk.SONY DSC
  7. When the temperature reaches 185 degrees Fahrenheit, cover and remove from heat.SONY DSC
  8. Immediately place inner pan with milk in an ice bath.SONY DSC
  9. Remove lid and whisk occasionally until the temperature drops between 118 to 110 degrees Fahrenheit.SONY DSC
  10. Remove from ice bath and whisk in yogurt starter. It should be completely blended into the milk.SONY DSC
  11. Ladle mixture into canning jars (sizes of your choice).SONY DSC
  12. Place lids and rings on jars.SONY DSC
  13. Empty the hot water out of the larger steamer pot and remove the steamer stand and place the filled canning jars in the pan.SONY DSC
  14. Place the lid on the pan.SONY DSC
  15. Wrap the pan in a fluffy towel or blanket for insulation and leave it alone on your kitchen counter for 6 to eight hours. SONY DSC
  16. Check to see if the yogurt has set (around 6 hours) by tilting one of the jars to the side slightly. If it is firm, it is set.SONY DSC

Our indoor temperature hovers around 76 degrees Fahrenheit and 50 percent humidity. I’d suggest wrapping in a nice and thick blanket if your indoor temperature runs a lot cooler.

Q: Why did I choose to share the yogurt recipe with you first?

A: It’s a beginning and it is used for other recipes that will follow, such as  strained Greek yogurt and Yo-cheese.

It’s your turn to make some yogurt. Go ahead, it’s pretty easy!

Share with me your yogurt making stories. Successes or failures. Past experiences or how it went when you followed my process. Can’t wait to hear from you!